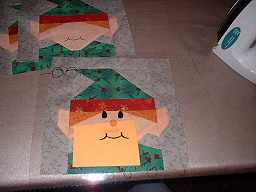
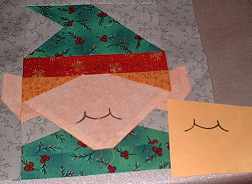
| Sometimes picture
quilt blocks need to have appliqué, or an embroidered or drawn features added to 'finish'
the block. I use a couple of special tools to make the job
easier. Here is a description of how I would transfer and mark the
line for the mouth, and add fusible appliquéd mouth and nose of the Elf block in my
Santa & Company quilted
banner, placemat and pillow pattern. These instructions work well for
adding features to Sally the Kitty
and
Simon the Puppy quilts also. |
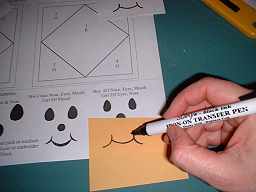
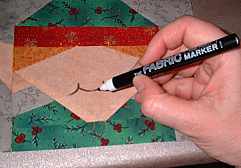
| Sulky makes a wonderful pen that
can turn a plain piece of paper into an iron-on transfer. The pen
comes in a variety of colors. I am using the black pen to trace the outline
of the mouth or other line onto a plain piece of paper. |
 |
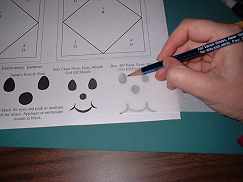
| Optional: Trace the shape
of the block and location for the mouth and/or other features onto a piece
of clear acetate. |
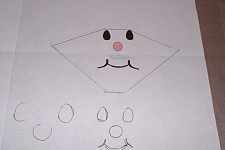 |
| Lay the acetate over the quilt
block and position the traced feature, ink side down, where you want it to
be on the finished block using the lines on the acetate as guides. |
 |
| Remove acetate and press paper with a hot iron.
Complete instructions for using the Sulky Transfer pen are included in the
pen packaging. |
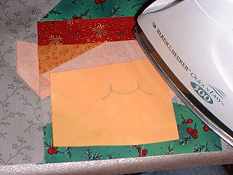 |
| Remove the paper. The line
has been transferred to the quilt block, and the transfer paper can be
reused! |
 |
| I could now embroider over the
line, leave it as is, or darken it with a fabric marking pen. Usually
I like to darken it. |
 |
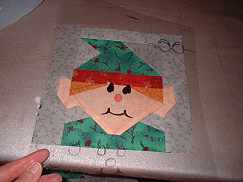
| Trace the eyes and nose onto the
paper side of fusible web. I like to use Steam-a-seam™. Follow
manufacturer's directions for attaching fusible web to the back-side of the
fabric for the nose and eyes. |
 |
| Use the acetate positioning
pattern to help position eyes and nose on the face then follow the
manufacturer's directions to fuse the features to the block. If the
project is to be washed then I recommend using a machine zigzag, satin or
blanket stitch around the fused appliqués to make sure it stays in place. |
 |